
Esp8266 nodemcu datasheet
NodeMCU firmware is an IoT project ("the Project") which implements a Lua-based runtime for SoC modules based on the Espressif ESP8266 and ESP32 architectures. This NodeMCU Reference Manual ( NRM) specifically addresses how the NodeMCU Lua implementation relates to standard Lua as described in the two versions of the Lua language that we.
Esp8266 nodemcu datasheet
Bu videomuzda Arduino arayüzüne entegre ettiğimiz NodeMCU kurulumu yaptık.👉Kurulum Linki:https://arduino.esp8266.com/stable/package_esp8266com_index.json 👉.

First Steps With The Nodemcu Esp8266 Wi Fi Module And Arduino Nano Images
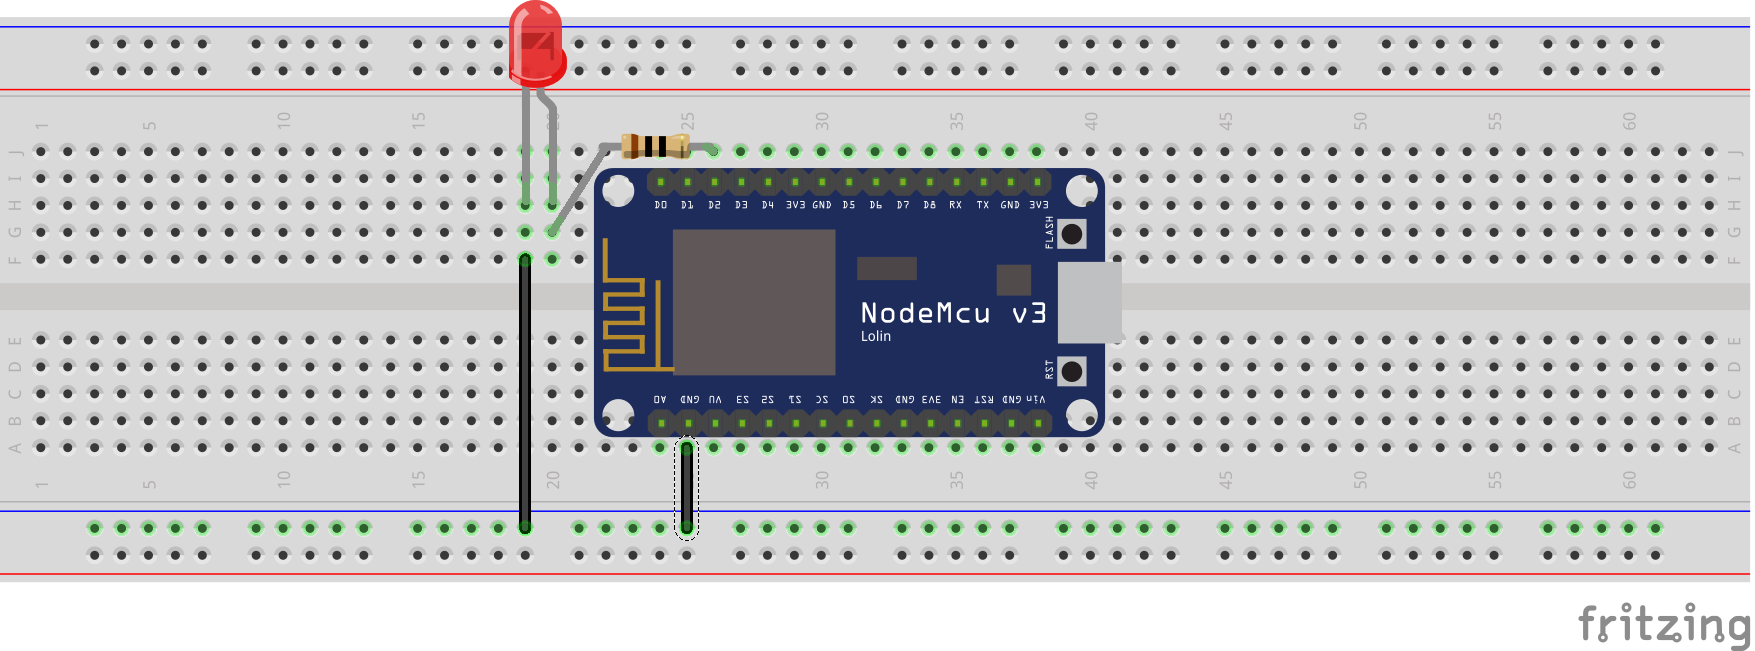
Step 1: Control an LED From Web Browser In this blog, we will see How to "Turn On and Turn Off" an LED that has connected to the Esp8266, the esp8266 has programmed from Arduino IDE to control the LED.

Smart Home Using Nodemcu Esp8266 And Blynk 2 Iot 2021 Project 8 Channel
ESPlorer is the de facto IDE for ESP8266 development. It can be downloaded from https://esp8266.ru/esplorer/. However when I launched the ESPlorer to access the newly acquired NodeMCU at the corresponding port, legible response was obtained only when the baud rate is set to 115200.

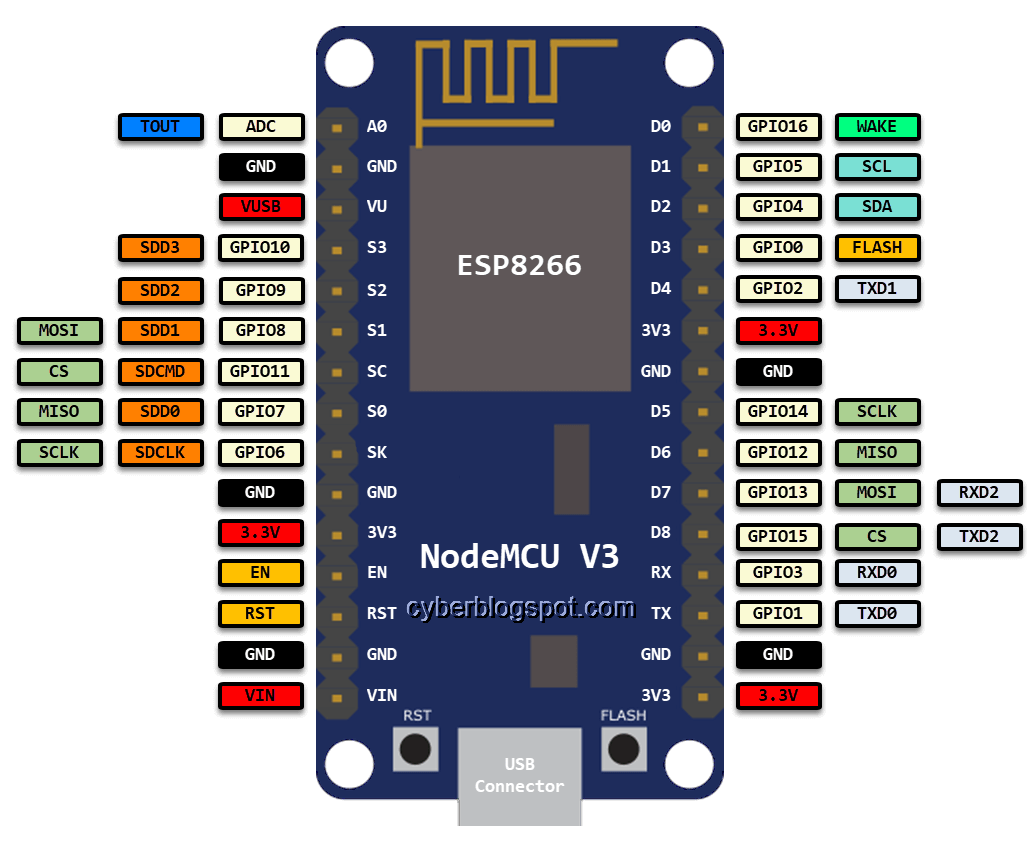
Nodemcu ESP8266 Pinout, Features, and specifications
NodeMCU is an open source platform based on ESP8266 which can connect objects and let data transfer using the Wi-Fi protocol. In addition, by providing some of the most important features of microcontrollers such as GPIO, PWM, ADC, and etc, it can solve many of the project's needs alone.
Getting Started with the NodeMCU (ESP8266 Based Development Board
Step 3: UPLOADING THE SKETCH :-. Now that the IDE is set up for NodeMCU you can test it by uploading an Example sketch as follows:-. In IDE Goto >> Files >> Examples >> ESP8266. Select the Blink Example and upload it. The onboard LED should start to blink.

ESP8266 (NodeMCU 1.0)
The ESP8266 Arduino core comes with several example sketches that demonstrate different functionalities, such as scanning for nearby networks or building a web server. To access these examples, go to File > Examples > ESP8266. You will see a list of example sketches. Choose any of them to load the sketch into the Arduino IDE and start.

IoT Project using ESP32 NodeMCU ESP8266 network with Blynk App IoT
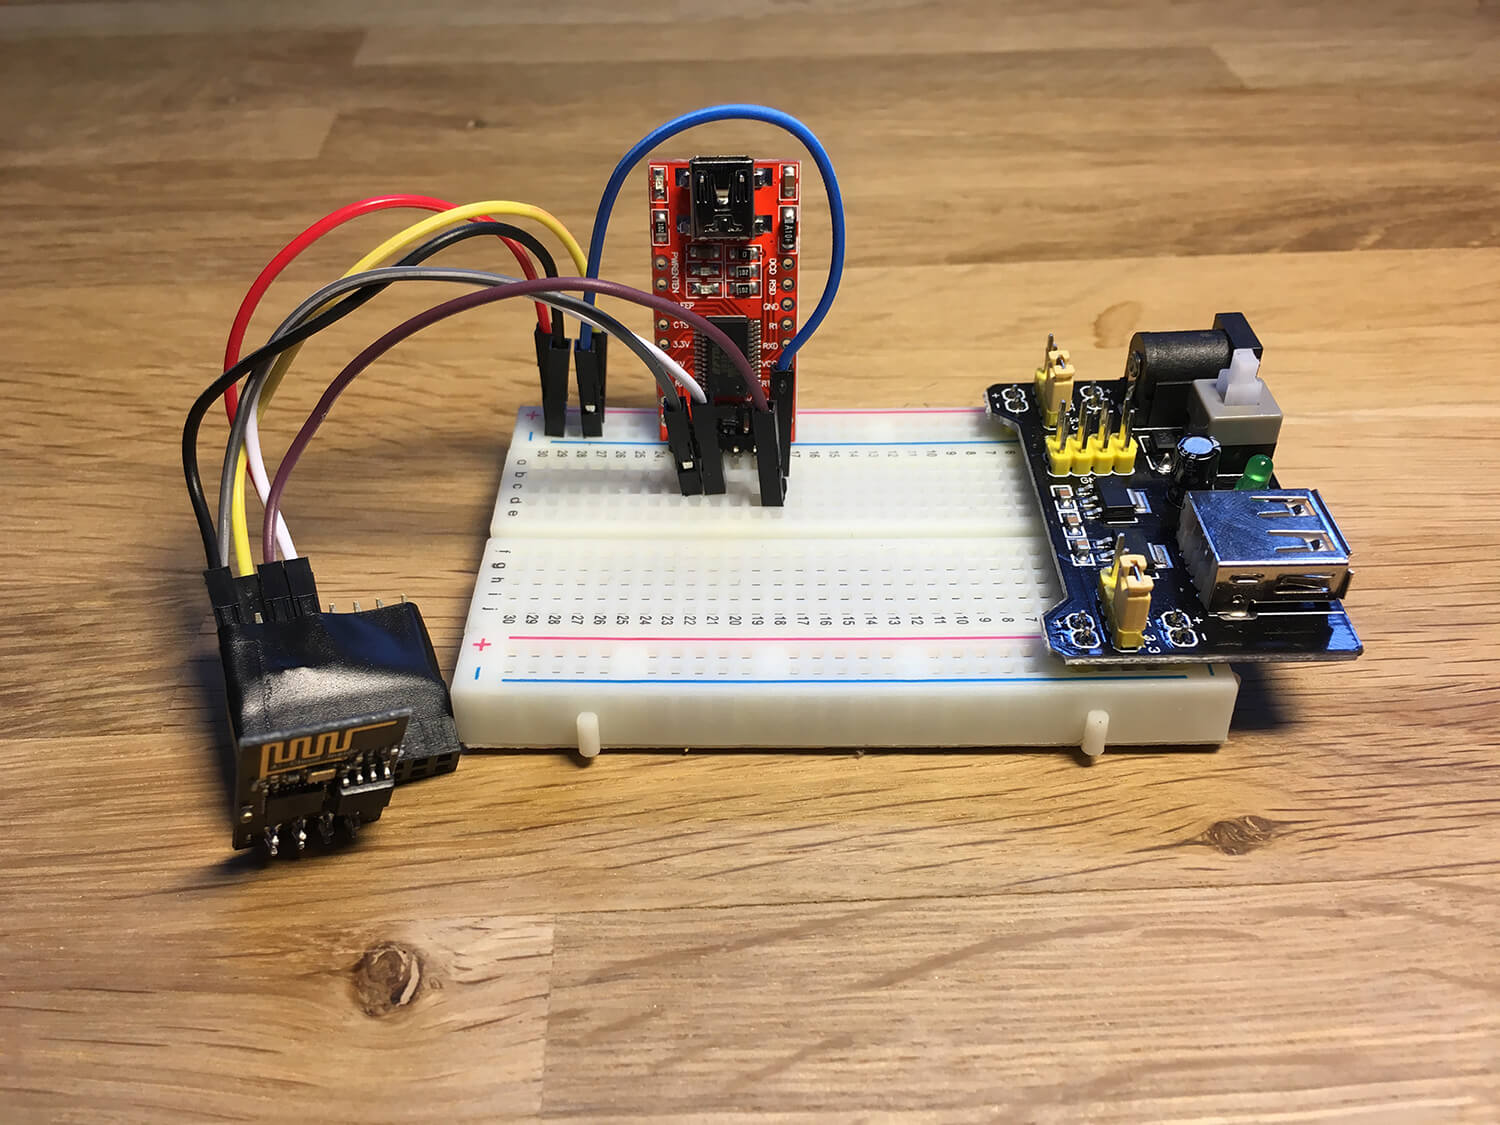
Step 1: Getting Setup Ready. we start first by shorting the Enable pin and GND, this will turn off the esp12f of the Nodemcu and now we can hook an external esp12f setup with the Nodemcu according to the given schematic. Flashing with Nodemcu instead of using FTDI Module is easier but this doesn't mean that it's a proper replacement, for more.

Getting Started with NodeMCU ( ESP8266 )
Technically speaking NodeMCU is a firmware for ESP8266 developed using C Programming Language, Espressif NON-OS SDK and Lua scripting language. Traditionally, we write code for our Microcontrollers like Arduino, STM32, 8051 etc., either in C or C++ and compile it with a set of tools and generate a binary file.

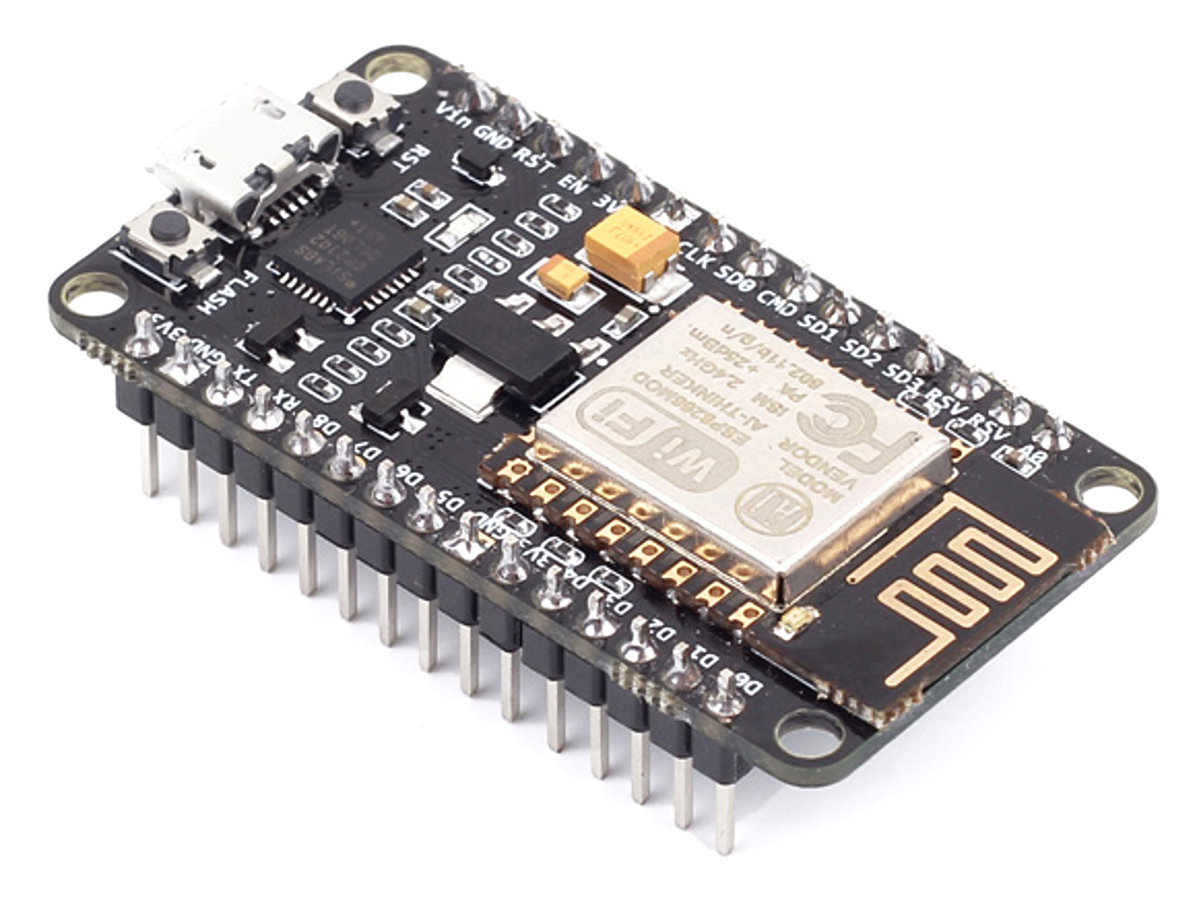
NodeMCU ESP8266 WiFi Lua Board, CP2102 99Tech
The ESP8266 is, the name of a microcontroller designed by Espressif Systems. It is a self-contained WiFi networking solution offering as a bridge from the existing microcontroller to WiFi and is also capable of running self-contained applications. For less than $3, it can monitor and control things from anywhere in the world - perfect for.
Getting Started With Esp8266 Nodemcu And Arduino Ide Of Things
The NodeMCU ESP8266 development board comes with the ESP-12E module containing the ESP8266 chip having Tensilica Xtensa 32-bit LX106 RISC microprocessor. This microprocessor supports RTOS and operates at 80MHz to 160 MHz adjustable clock frequency. NodeMCU has 128 KB RAM and 4MB of Flash memory to store data and programs.
Home Automation using NodeMCU (ESP8266) board
Install ESP8266 NodeMCU Add-on in Arduino IDE To install the ESP8266 board in your Arduino IDE, follow these next instructions: 1. In your Arduino IDE 2.0, go to File > Preferences. 2. Copy and paste the following line to the Additional Boards Manager URLs field. http://arduino.esp8266.com/stable/package_esp8266com_index.json
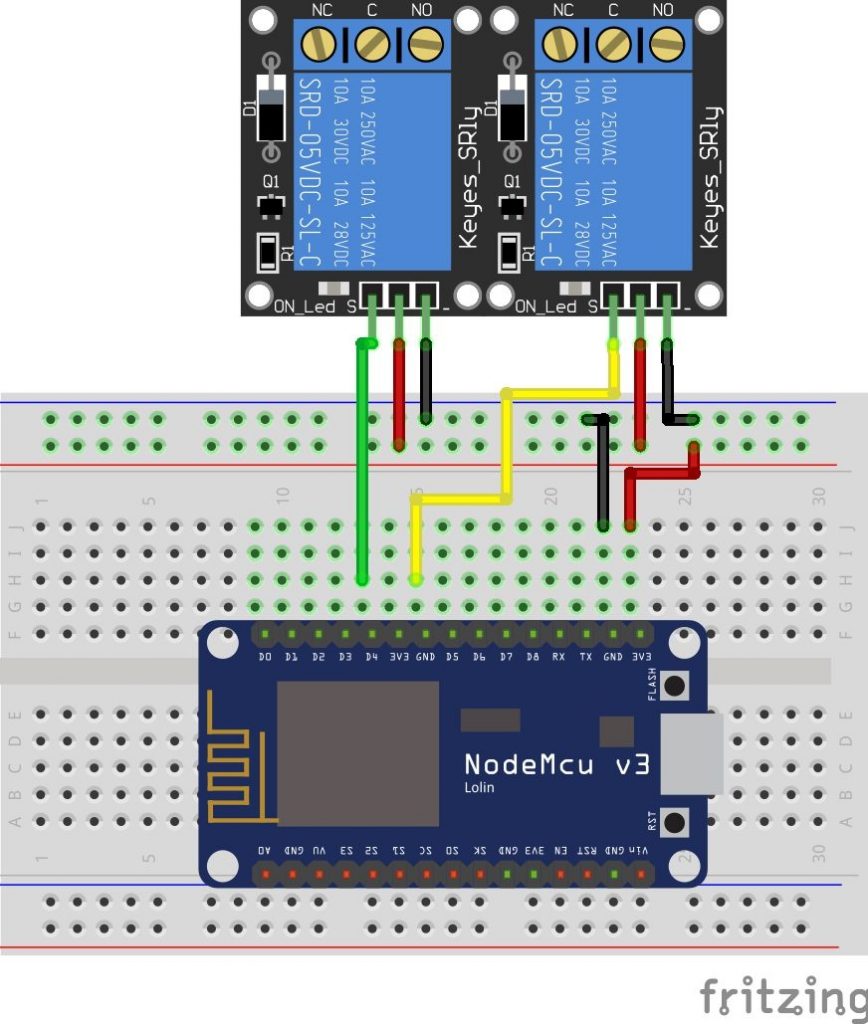
Home Automation using NodeMCU (ESP8266) board
We have more than 150 ESP8266 NodeMCU Tutorials and project ideas as well as a Premium eBook Home Automation using ESP8266.Using the next quick links, you'll find all our ESP8266 Guides with easy to follow step-by-step instructions. Each tutorial includes circuit schematics, source code, images and videos.
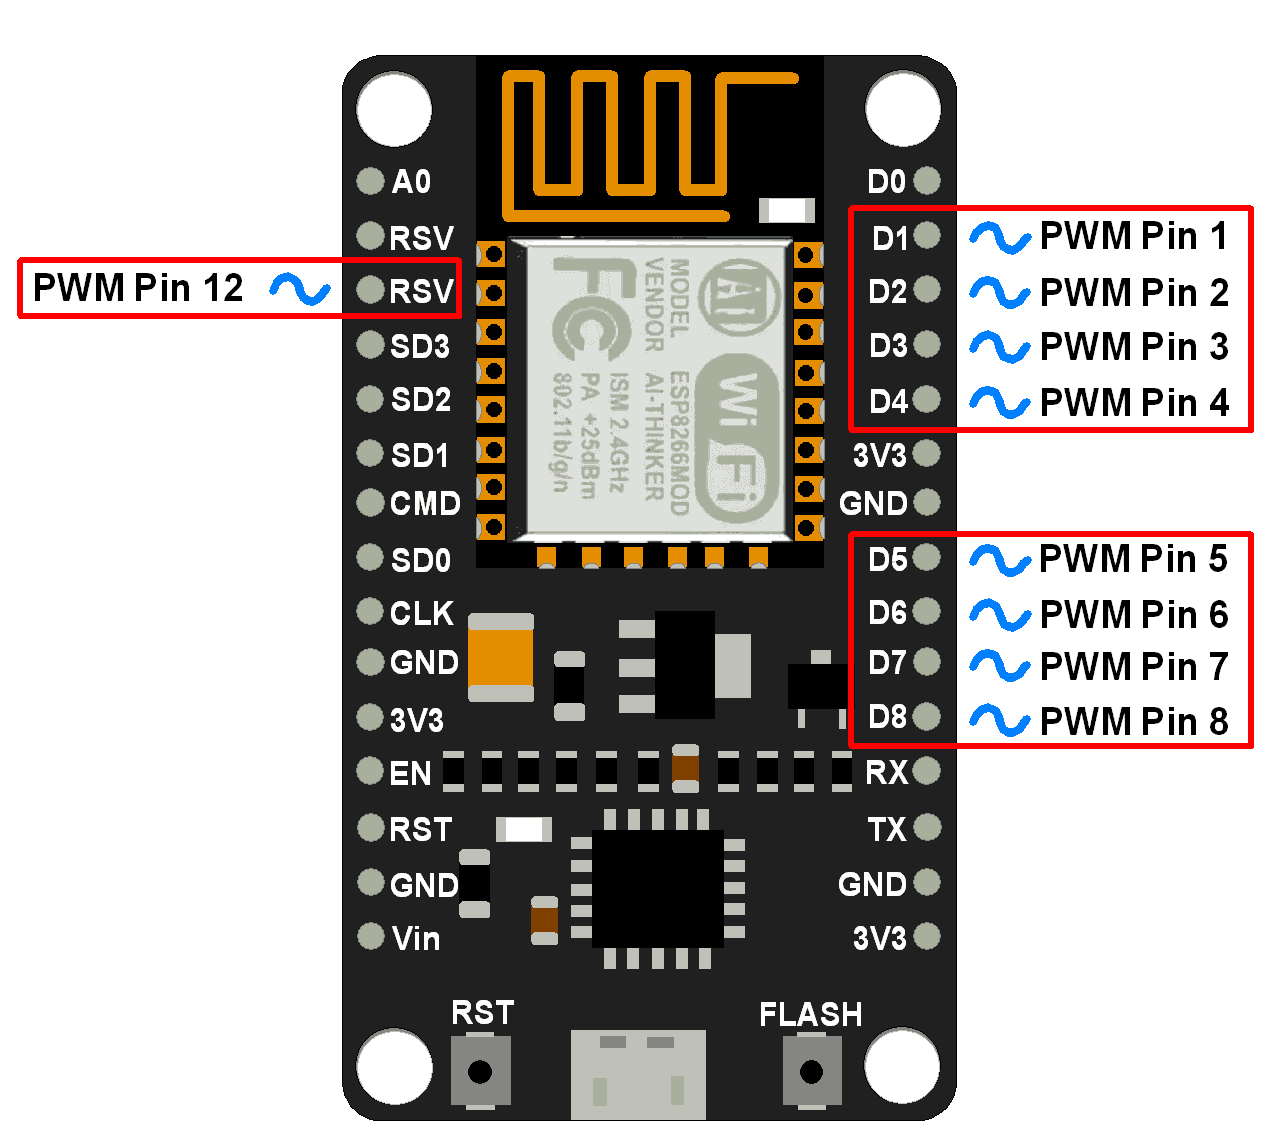
Nodemcu ESP8266 Pinout, Features, and specifications
What is an ESP8266 NodeMCU? The ESP8266 is a low-cost Wi-Fi chip developed by Espressif Systems. It can be used as a standalone device, or as a UART to Wi-Fi adaptor to allow other microcontrollers to connect to a Wi-Fi network. For example, you can connect an ESP8266 to an Arduino to add Wi-Fi capabilities to your Arduino board.

nodeMCU ESP8266 Kurulum (Setup) YouTube
Step 7: Boot. We put the oscilloscope at the tip of each pin. This allows us to find, for example, that when we turn on the NodeMCU, its pins are not all the same. Some are up and others down, by default. See the comments on the behavior of each post after the boot in the image below. Step 8: Constants That Are Already Predefined.

NodeMCU ESP8266 Kurulum ve Programlama YouTube
The ESP8266, designed and manufactured by Espressif Systems, contains the crucial elements of a computer: CPU, RAM, networking (WiFi), and even a modern operating system and SDK. That makes it an excellent choice for Internet of Things (IoT) projects of all kinds. However, as a chip, the ESP8266 is also hard to access and use.
