
FoodieScoop Ricotta Gnocchi with Spinach Pesto Sauce
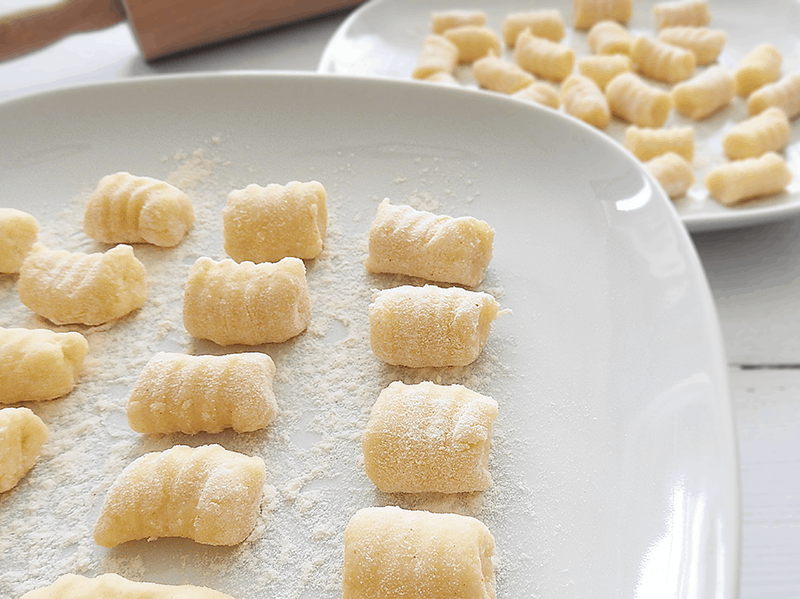
However, you can absolutely make gnocchi ahead of time and freeze the already formed little dumplings for future use. To do so, arrange gnocchi in a single layer on two lightly floured baking sheets. Cover with cling film and freeze until solid, usually 2 hours. Then transfer to heavy-duty sandwich bags labelled with contents and date.

Homemade Gnocchi Savour Venice
Add the potatoes to a large pot and cover with water. Bring to a boil and cook until the potatoes are just fork tender, about 20 to 25 minutes. Drain and allow to cool. When the potatoes are cool enough to handle, peel the skin. Cut the potatoes into thirds and then press through a potato ricer over a lightly floured surface.

[Homemade] gnocchi with browned sage butter and truffle r/food
Align the Gnocchi on the tray so that they are not touching each other. Make sure the tray fits the freezer. Place the tray filled with Gnocchi in the freezer and let it freeze for a few hours. Take it off the freezer and transfer it to either freezer bags, or an airtight container. Leave them for whenever needed.

How to Make Homemade Gnocchi with Ricotta Cheese Yummy Pasta Recipes
Place the Gnocchi in a single layer on the baking sheet. Make sure the dough does not touch each other. Place the baking pan in the freezer and flash freeze for three hours or until the Gnocchi is firm and frozen. This is not a necessary step, but it makes it easier for you to grab the required amount of Gnocchi at a time.
Homemade Freeze Ahead Gnocchi Recipe Feed Your Sole
Yes, you can freeze gnocchi. This much-loved Italian dumpling specialty can be used in a variety of delicious dishes, and when frozen properly, can be kept for up to 1-2 months! If you want to learn how to freeze the perfect gnocchi, keep reading below. Reheating is one part of the process of preparing leftovers or convenience foods, but.
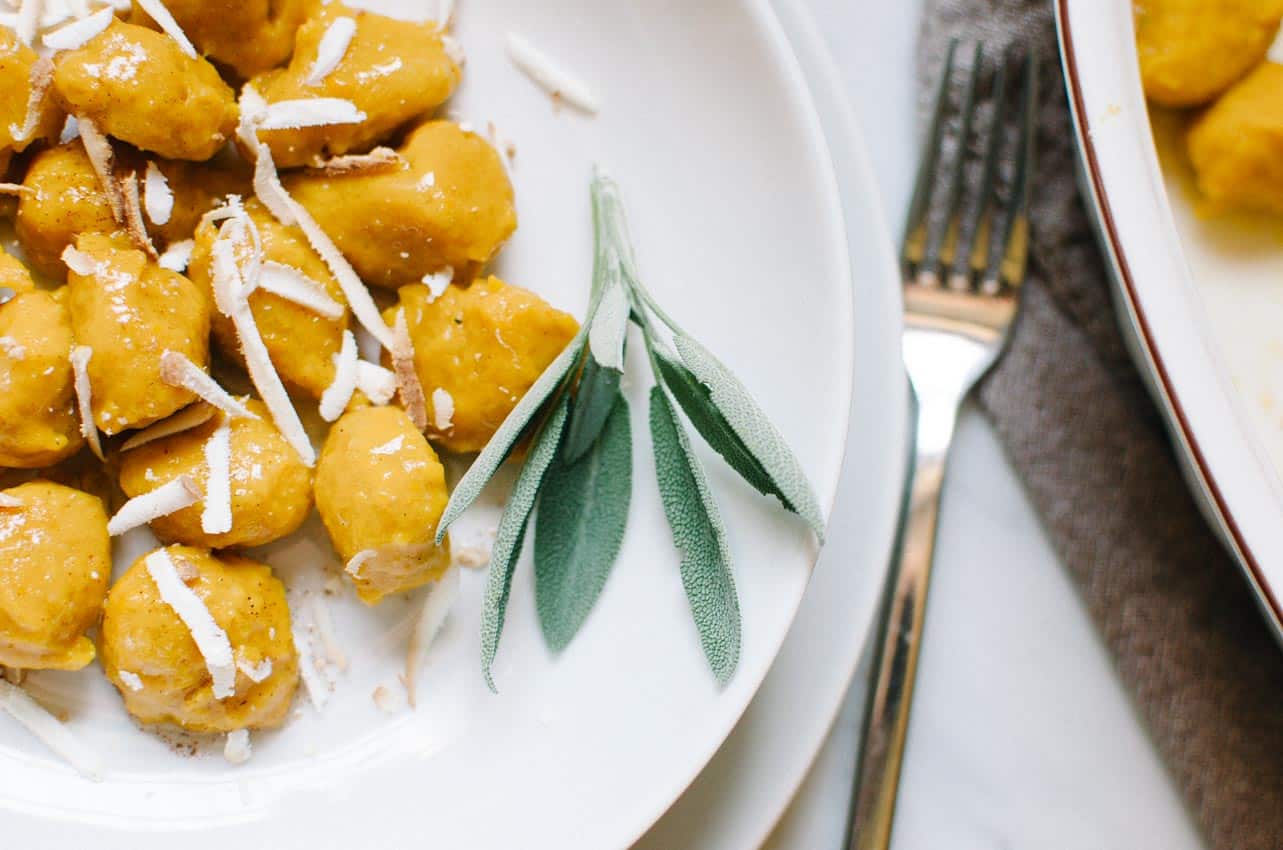
Fluffy Pumpkin Gnocchi with Smoked Ricotta Very EATalian
Here's how: Cook the gnocchi according to the package instructions. Drain the cooked gnocchi and let them cool completely. Transfer the cooled gnocchi into a freezer-safe container or bag. Seal the container or bag tightly, making sure to remove any excess air. Label the container with the date and contents.

Skillet Gnocchi with Chard & White Beans Mississippi Market Coop
Make a well in the centre, add the beaten egg and work into the mixture with the knife until well combined. Bring the mixture together lightly with your hands until it just forms a coherent lump. Don't overwork it or the gnocchi will be tough. Lightly flour the work surface and shape the dough with your hands into an 18cm square about 1.5cm.

Creamy Gnocchi with Peas Tried & True Recipes
Freeze the raw gnocchi by placing it in a single layer on a cookie sheet. Next, place the tray in the freezer in a level position, and allow the gnocchi to freeze until solid. This process can take up to 3 hours. Next, collect the frozen gnocchi and place it in resealable bags or airtight containers. Store them for 4 to 6 weeks.

Spring Veggie Gnocchi 12 Tomatoes
Freeze your uncooked gnocchi by arranging them in a single layer on a baking pan. Then, place the pan in the freezer in a level position, and allow the gnocchi to freeze until solid. This process takes up to 3 hours. Afterward, gather the frozen gnocchi and place them inside resealable bags or air-tight containers.

Homemade Gnocchi with Sharp Cheddar Sauce Carpe DiYum
Here's how to freeze homemade gnocchi: First, cook the gnocchi according to the recipe. This will give them a consistent texture and prevent sticking once they're frozen. Next, place cooked gnocchi in a single layer on a baking sheet lined with parchment paper. Put the baking sheet in the freezer for 2-3 hours until the gnocchi are frozen.
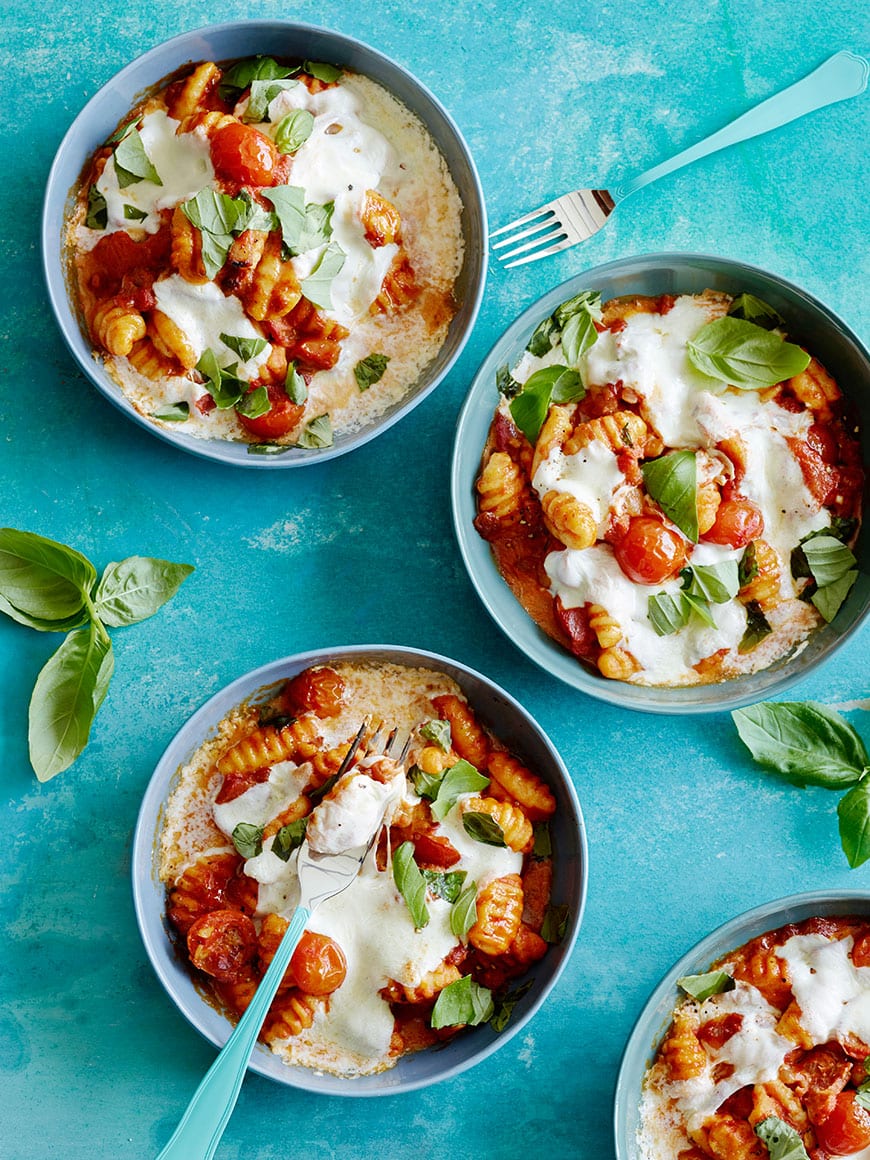
Cheesy Baked Gnocchi What's Gaby Cooking
Put the raw gnocchi on the baking sheet in a single layer. Try to avoid them touching one another. Pop the pan in the freezer in a flat area and freeze. Transfer to Bag: Once the gnocchi has frozen or after about three hours you can transfer them to a freezer bag. Final Freeze: Label and date the bag and put it back in the freezer.
Easy Homemade Potato Gnocchi (+ lemon herb sauce) Alphafoodie
Place into oven and bake until tender, about 1 hour. Let cool completely. Cut in half; scoop flesh into a medium bowl and mash. Transfer 1 1/2 cups to a large bowl; stir in flour, ricotta, Parmesan, egg, 3/4 teaspoon salt and 1/4 teaspoon pepper. Working on a lightly floured surface, divide dough into 6 equal pieces.

Vegan Gnocchi Peas & Cherry Tomatoes
Make a well in the middle and place HALF of the whisked egg yolk in the middle. Fold the mixture inwards with your hands and lightly knead it together. Only fold it as much as is needed to get to a smooth consistency and no more. We are talking 6-8 folds inwards maximum. Dust your surface with more flour if needed.

We Don't Eat Anything With A Face PanFried Gnocchi with Garlic & Chilli
Then, place the gnocchi in a single layer on a baking sheet and put it in the freezer. Once the gnocchi is frozen, transfer it to a resealable plastic bag or an airtight container and store it in the freezer for up to three months. To reheat frozen gnocchi, you can boil it in water for a few minutes or pan-fry it in some oil or butter.

Vegan Gnocchi all arrabbiata on a plate with basil on top Zucker
Here's a step-by-step guide on how to freeze gnocchi: Step 1: Select fresh gnocchi. Step 2: Cook the gnocchi. Step 3: Drain and cool. Step 4: Drain and pat dry. Step 5: Portion for freezing. Step 6: Arrange on a baking sheet. Step 7: Flash-freeze the gnocchi. Step 8: Package and seal.

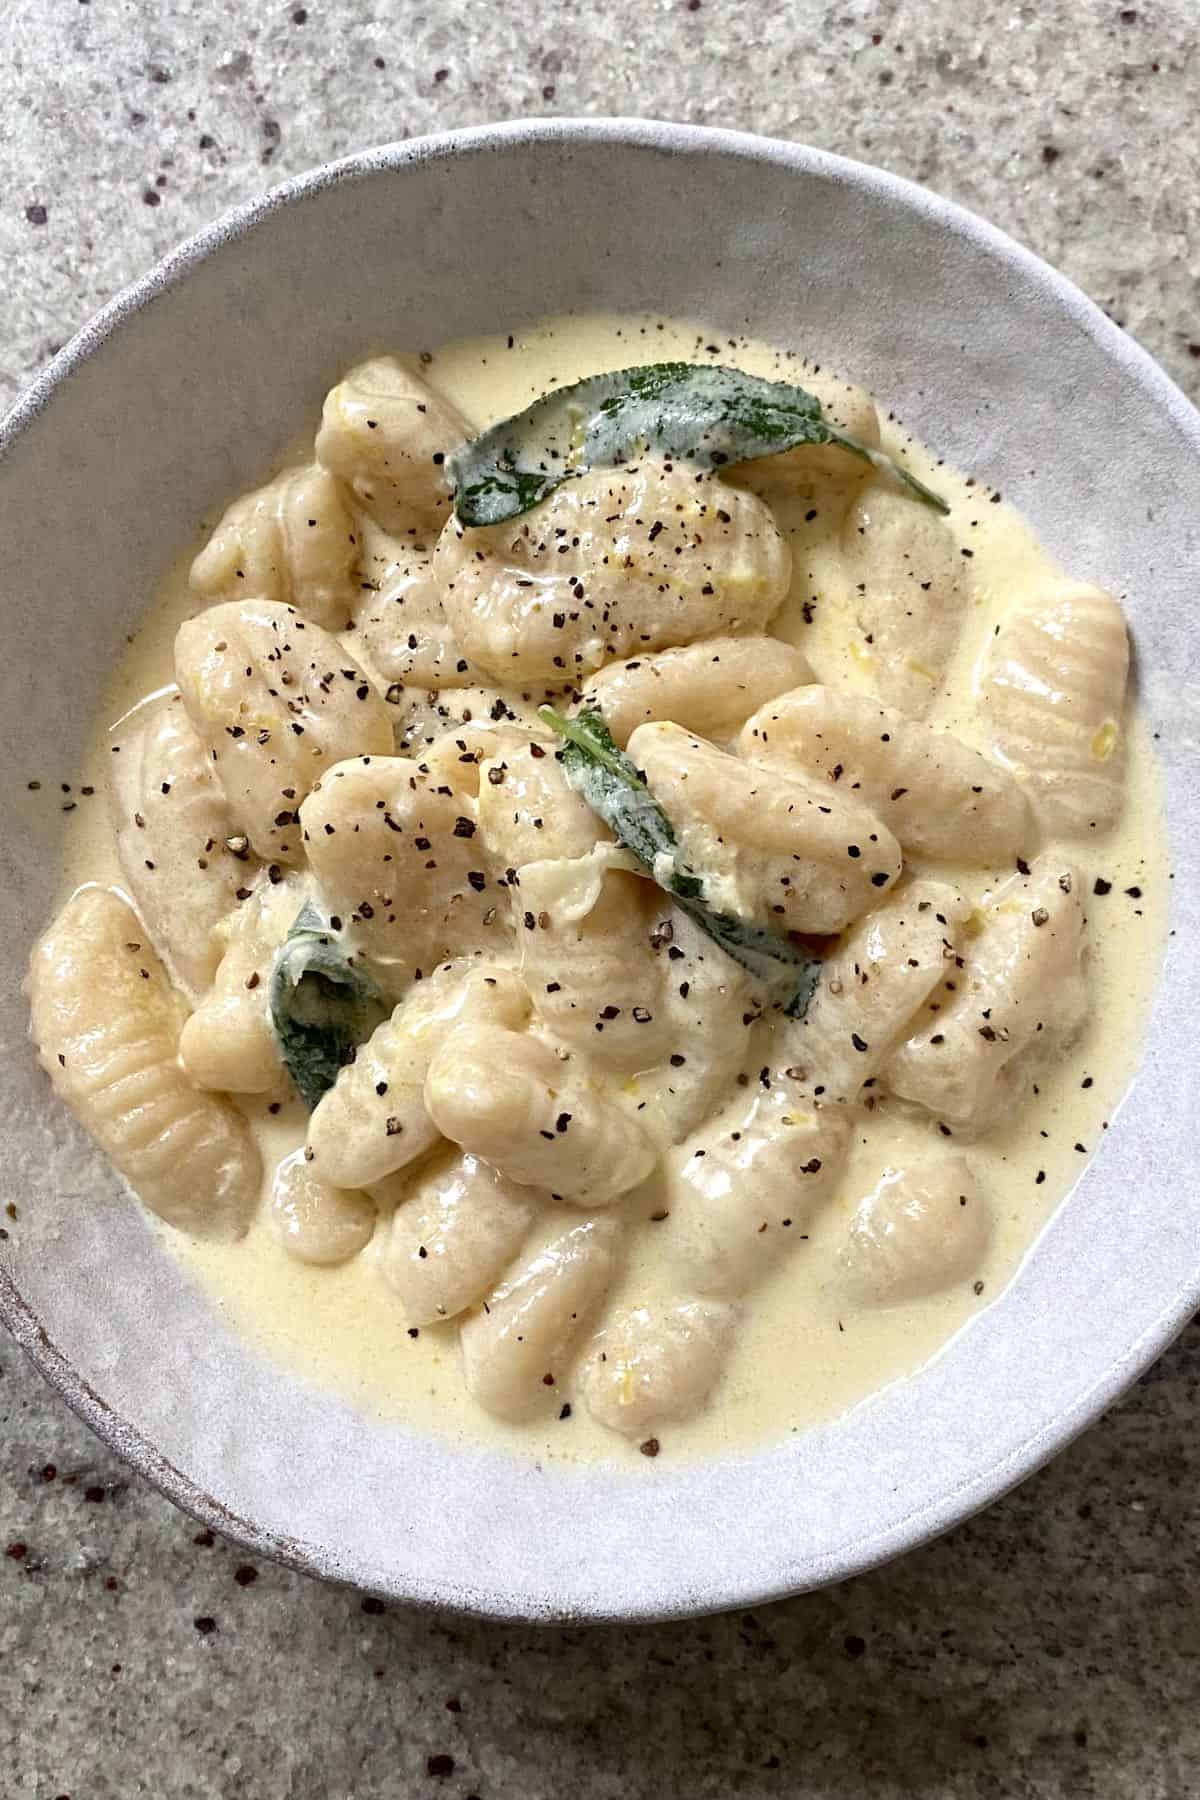
Gnocchi with Lemony Sage Brown Butter Sauce Gimme Some Oven
For best results, lay out the prepared gnocchi in a single layer on a baking tray lined with parchment paper. Place the tray in the freezer overnight so the gnocchi freeze. The next day, take the frozen gnocchi out and place them in a resealable freezer bag. This takes us to tip number 2 below. Photo credit: Max Nayman.
