
Ninja Foodi Grill Salmon Wendy Polisi
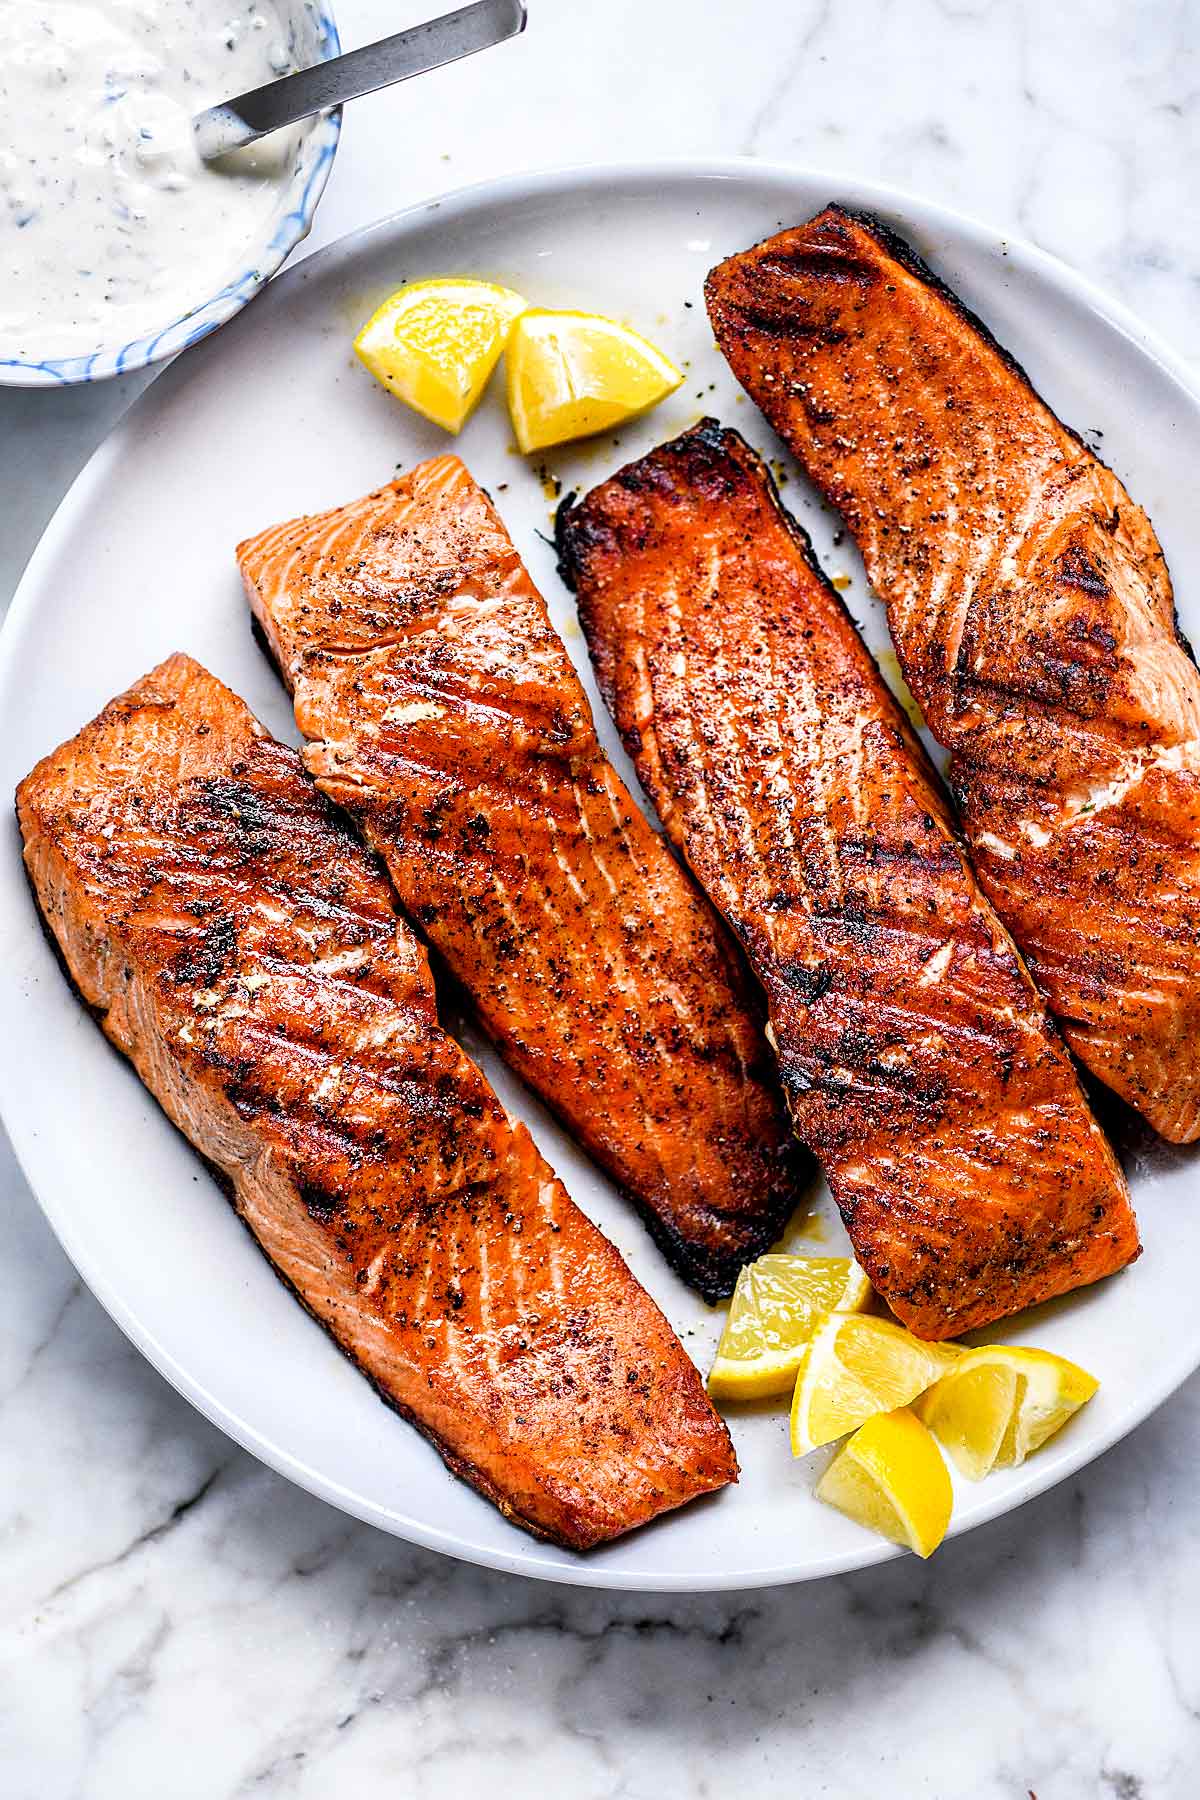
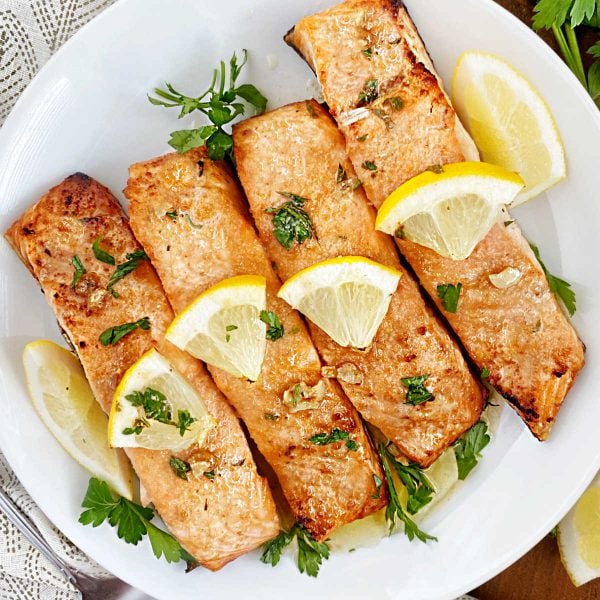
Preheat your Ninja Foodi Grill to the desired temperature. We recommend starting with 400°F for a perfectly cooked salmon. Place the seasoned salmon fillets on the grill grate, skin-side down if using skin-on fillets. Cook the salmon for approximately 5-6 minutes per side, depending on the thickness of the fillets.

Ninja Foodi Grill, Salmon Review 💋 YouTube
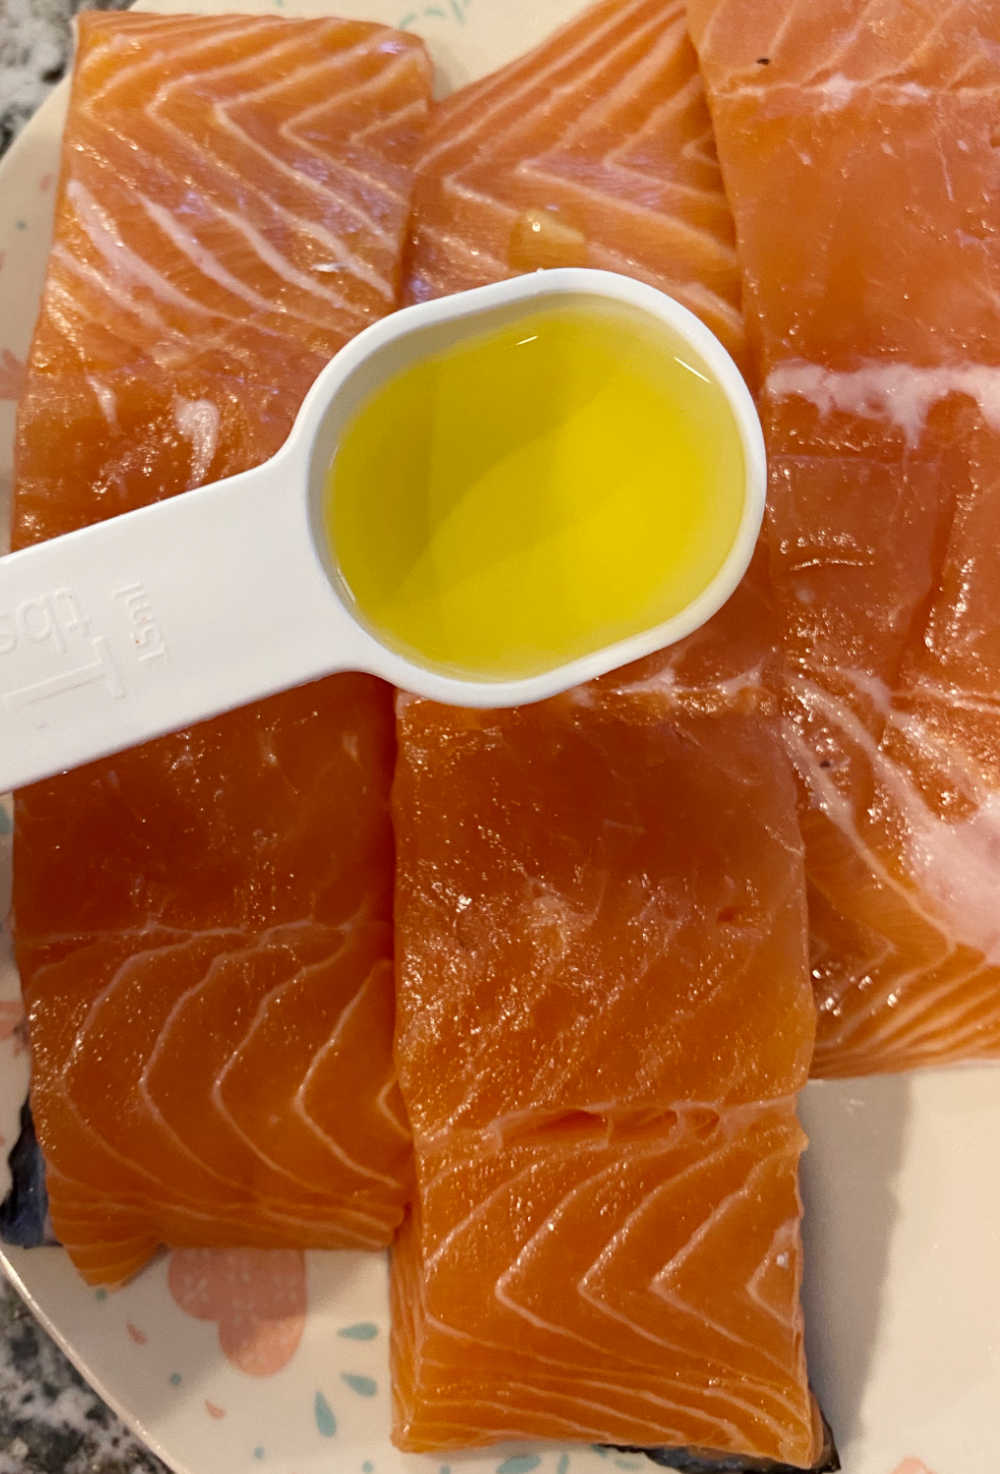
You can also cut it into smaller, 2-inch serving size pieces. Step 4. Brush both sides of the salmon filets with olive oil. Step 5. Sprinkle the salmon rub evenly on both sides and let the rub absorb into the fish while the grill preheats. Step 6. Turn dial to GRILL, set temperature to HI, and set time to 20 minutes.
Easy Ninja Foodi Grill Salmon Recipe Meatloaf and Melodrama
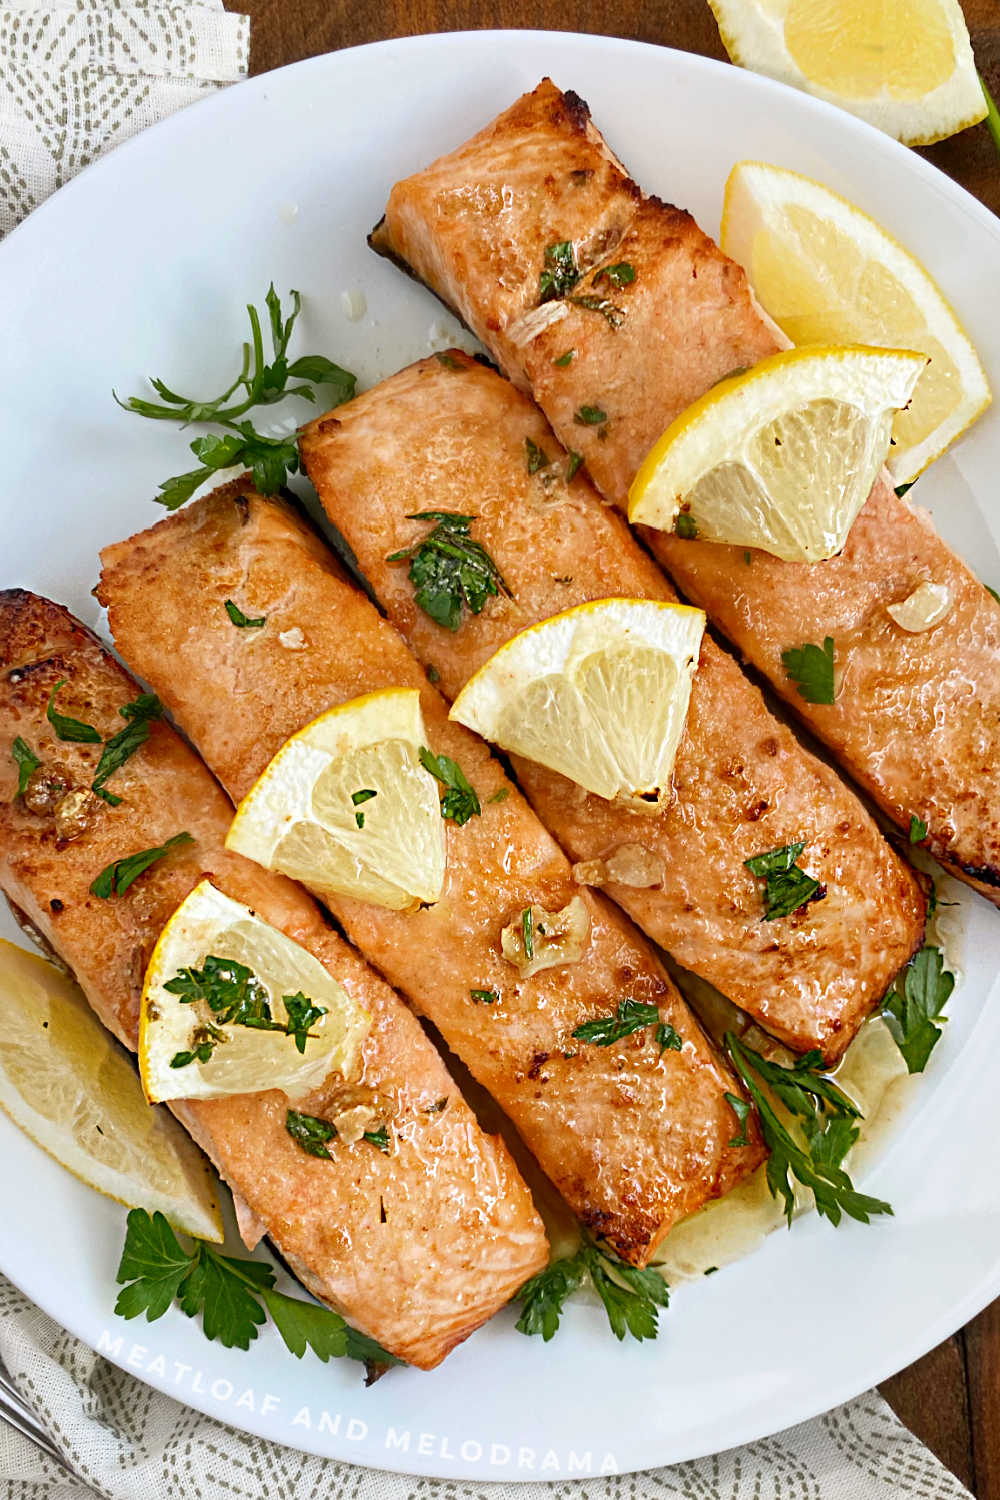
Step 1. Insert the Grill Grate and close the hood. Select GRILL, set the temperature to MAX, and set the time to 8 minutes. Select START/STOP to begin preheating. Step 2. Place the salmon, skin-side down, on a cutting board. Season it with 1/2 teaspoon of salt. Turn the salmon and season the skin with the remaining 1/2 teaspoon of salt.
Easy Ninja Foodi Grill Salmon Recipe Meatloaf and Melodrama
Shop Ninja Foodi 5-in-1 Indoor Grill with 4-qt Air Fryer, Roast, Bake, & Dehydrate Stainless Steel/Black at Best Buy.. Cooks as fast as your outdoor grill. Grill 4 7-oz salmon fillets in 8 minutes, 4 4-oz burgers in 6 minutes, or 2 12-oz steaks in 11 minutes.. HOWEVER it is important to mention that meat would have been overcooked if I.
Ninja Foodi Grilled Shrimp Foil Packs Mommy Hates Cooking
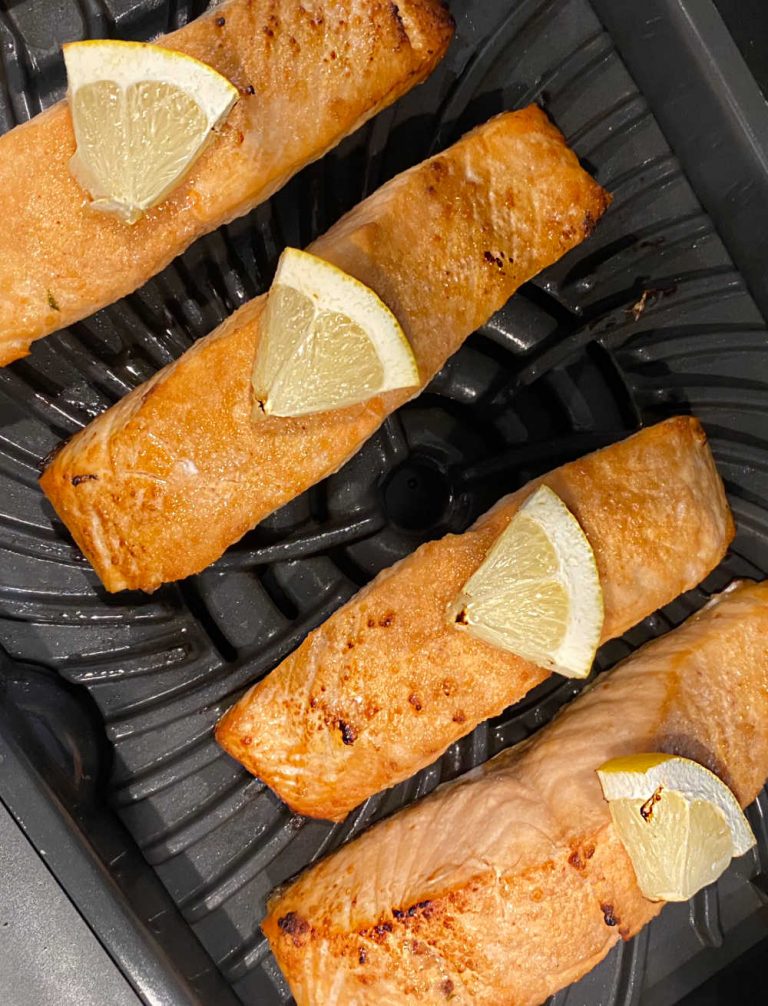
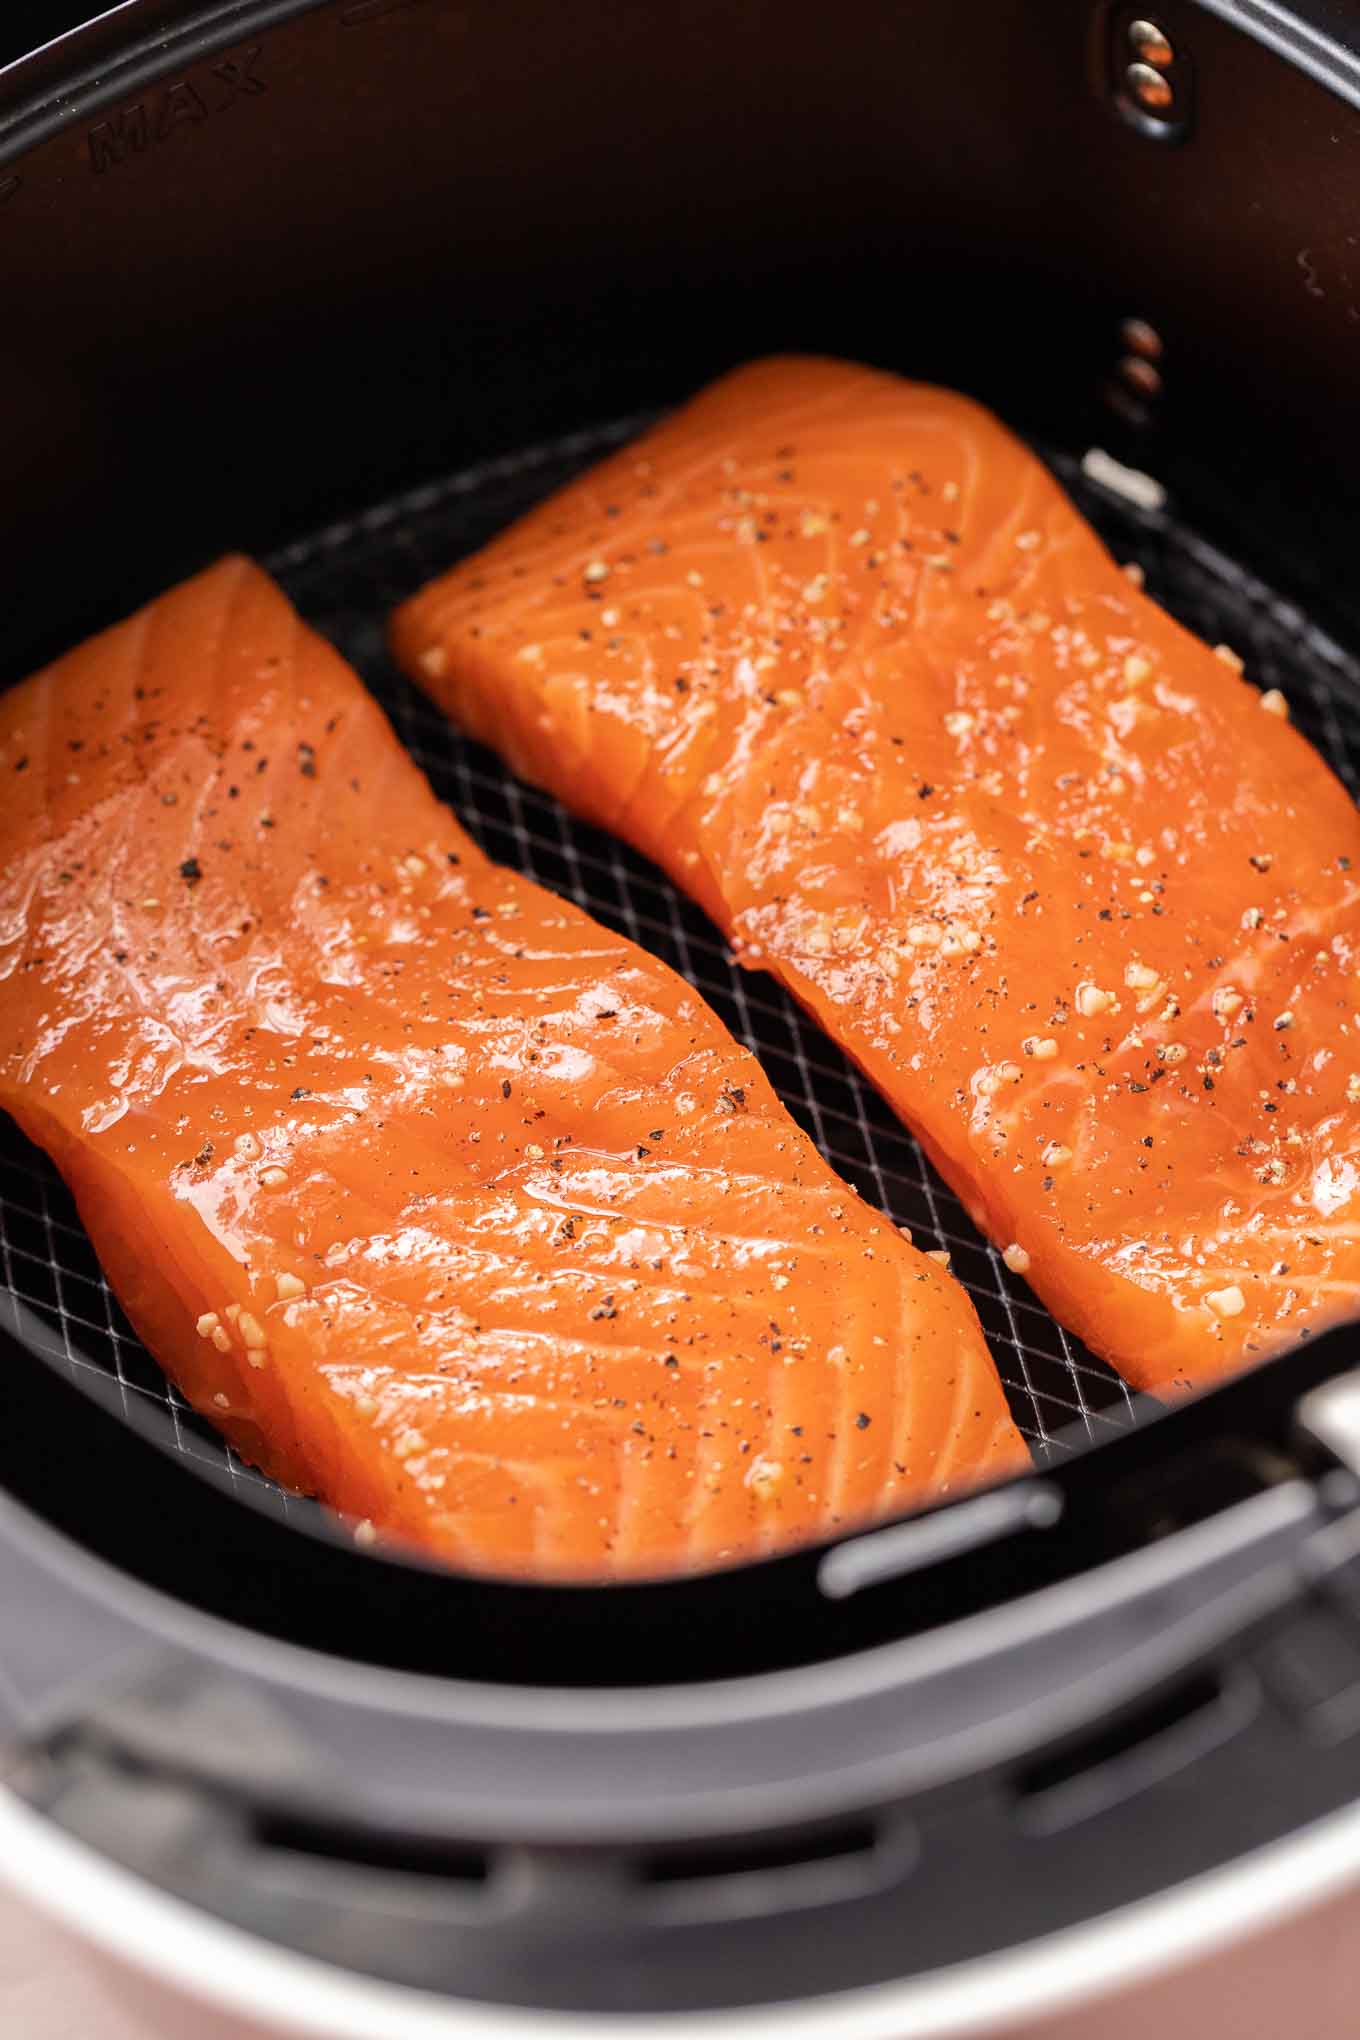
Place seasoned salmon in the air fryer basket, skin side down. You will need to cook this recipe in batches. 1 large filet or two large ones can be cooked at a time. Close the crisper lid, and cook Salmon in the Ninja Foodi using the Air Fry setting at 390°F/198°C for 8 to 10 minutes. When salmon is done, remove from the air fryer.

Ninja Foodi Grill Extra BBQ Sauce
STEP ONE: Pat your salmon filets dry before sprinkling them with salt, pepper, and garlic powder. STEP TWO: Add the water to the inner pot of the Ninja Foodi and place the metal trivet inside. STEP THREE: Line the trivet with lemon slices, being sure to reserve two for the top of the filets. STEP FOUR: Transfer the seasoned filets to the foodi.

Grilled spicy teriyaki salmon using Ninja Foodi Grill YouTube
Instructions. Spray the fillets with avocado oil. Lightly season the fillets with BBQ rub and add your thermometer into the thickest part of one of the filets. Add pellets to NWG. Set NWG to Grill setting High at 10 minutes. Hit the start button and let NWG go through the ignition and pre-heat process. Add fillets and lemon halves to grill.
Ninja AF300UK Foodi Dual Zone Air Fryer Gerald Giles
The cooking time for salmon in the ninja foodi grill can vary depending on the thickness of the fillets and the desired level of doneness. As a general guideline, it usually takes about 4-6 minutes per side to cook salmon to medium-rare. Thicker fillets may require slightly longer cooking times.
How to Make THE BEST Grilled Salmon foodiecrush
Place the salmon in a shallow dish. In a small bowl, combine the soy sauce, brown sugar, avocado oil, lemon pepper, garlic powder, and salt. Pour over the salmon and marinate in the refrigerator for 2 hours. Remove the salmon from the marinade and discard the marinade. Preheat your Foodi Grill to Grill - MAX.
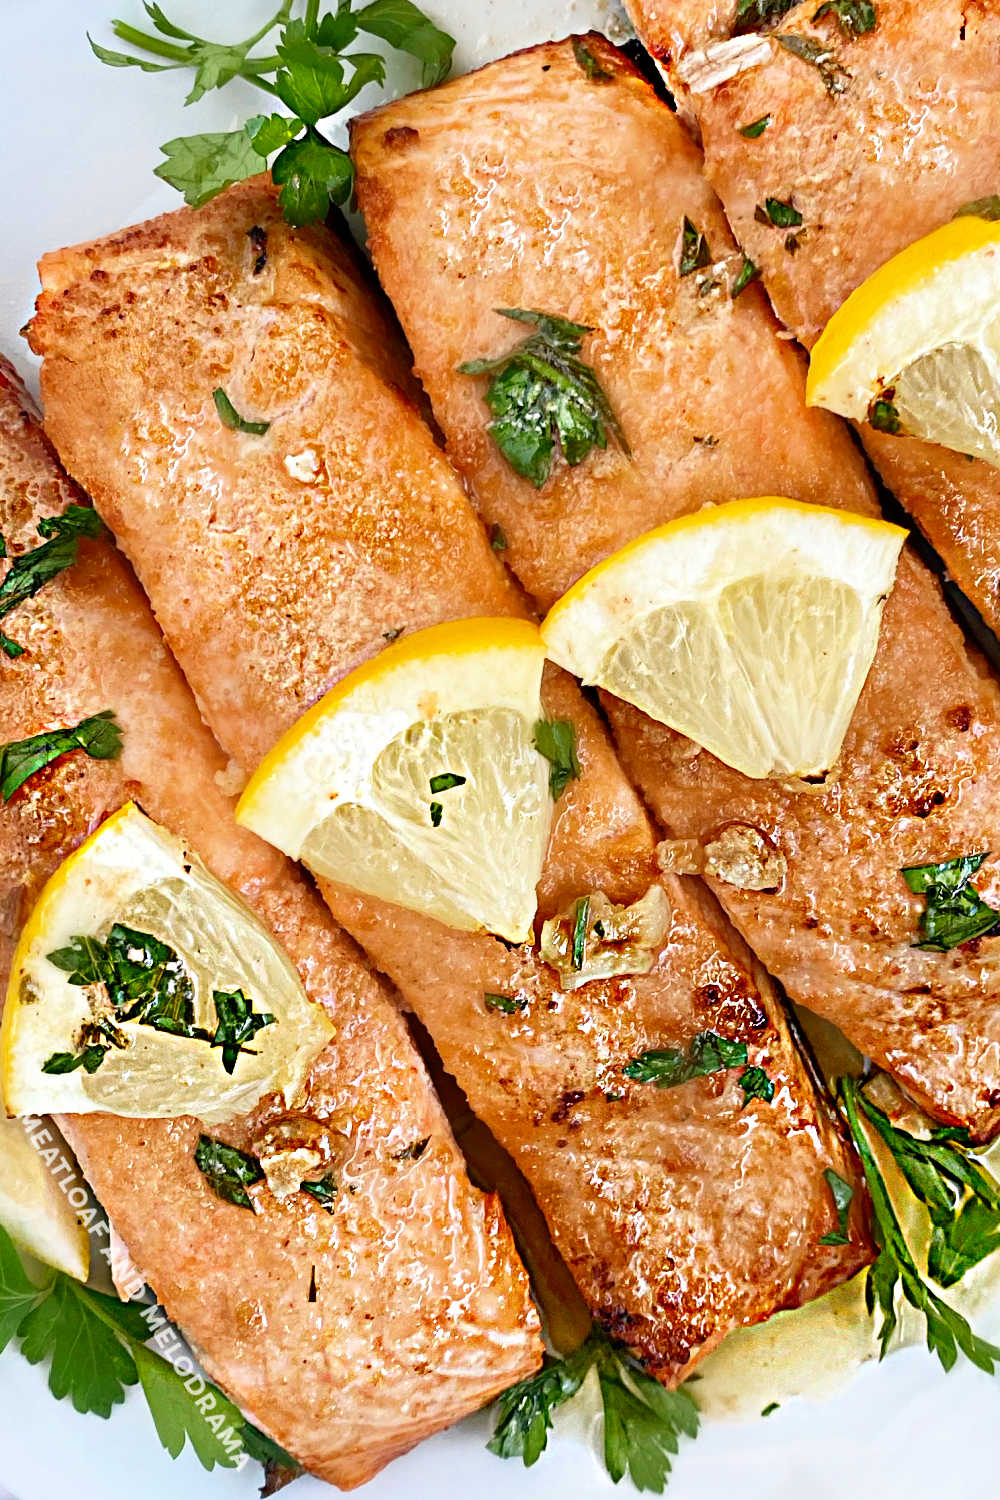
Easy Ninja Foodi Grill Salmon Recipe Meatloaf and Melodrama
Instruction: Place the salmon in a shallow dish. In a small bowl, combine the soy sauce, brown sugar, avocado oil, lemon pepper, garlic powder, and salt. Pour over the salmon and marinate in the refrigerator for 2 hours. Remove the salmon from the marinade and discard the marinade. Preheat your Foodi Grill to Grill - MAX.
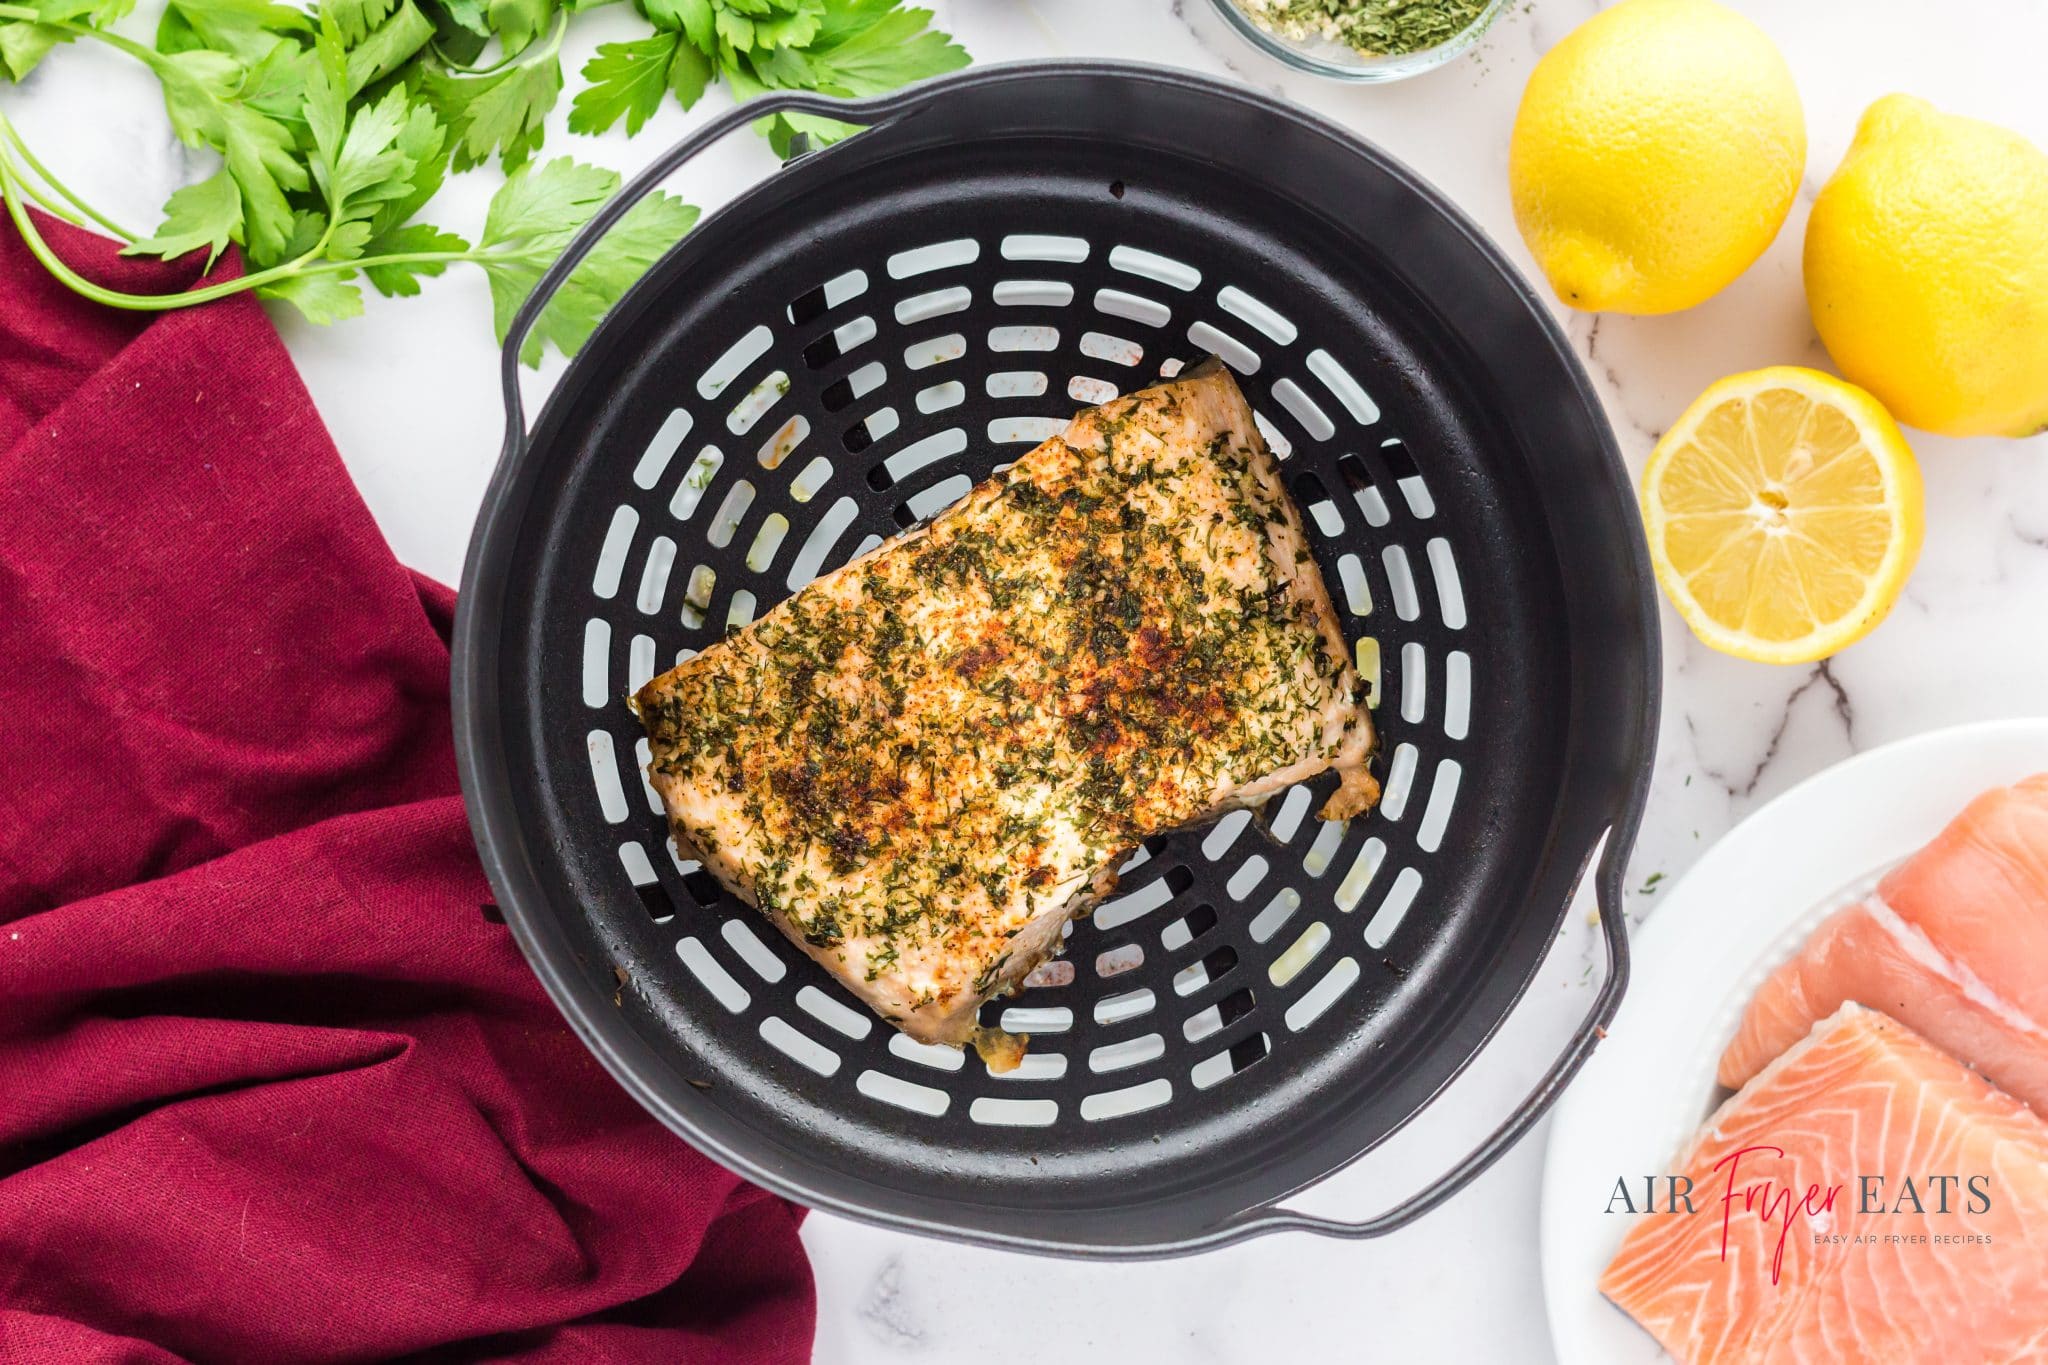
Ninja Foodi Salmon Air Fryer Eats
Yes, the Ninja Foodi Grill is suitable for grilling various types of fish, such as tilapia, halibut, and trout. 10. Can I grill salmon and vegetables simultaneously on the Ninja Foodi Grill? Yes, the Ninja Foodi Grill provides ample space for grilling both salmon and vegetables at the same time, making it a convenient option for a complete meal.

SALMÓN / EASY & DELICIOUS / NINJA FOODI DELUXE YouTube
4-6 salmon fillets (4-6 ounces each), deboned, skin-on. 2 tablespoons canola oil. kosher salt, as desired. ground black pepper, as desired. Step 1. To install the grill grate, position it flat on top of the heating element and gently press down until it sits into place, then close the hood. Step 2. Turn dial to GRILL, set temperature to HI, and.
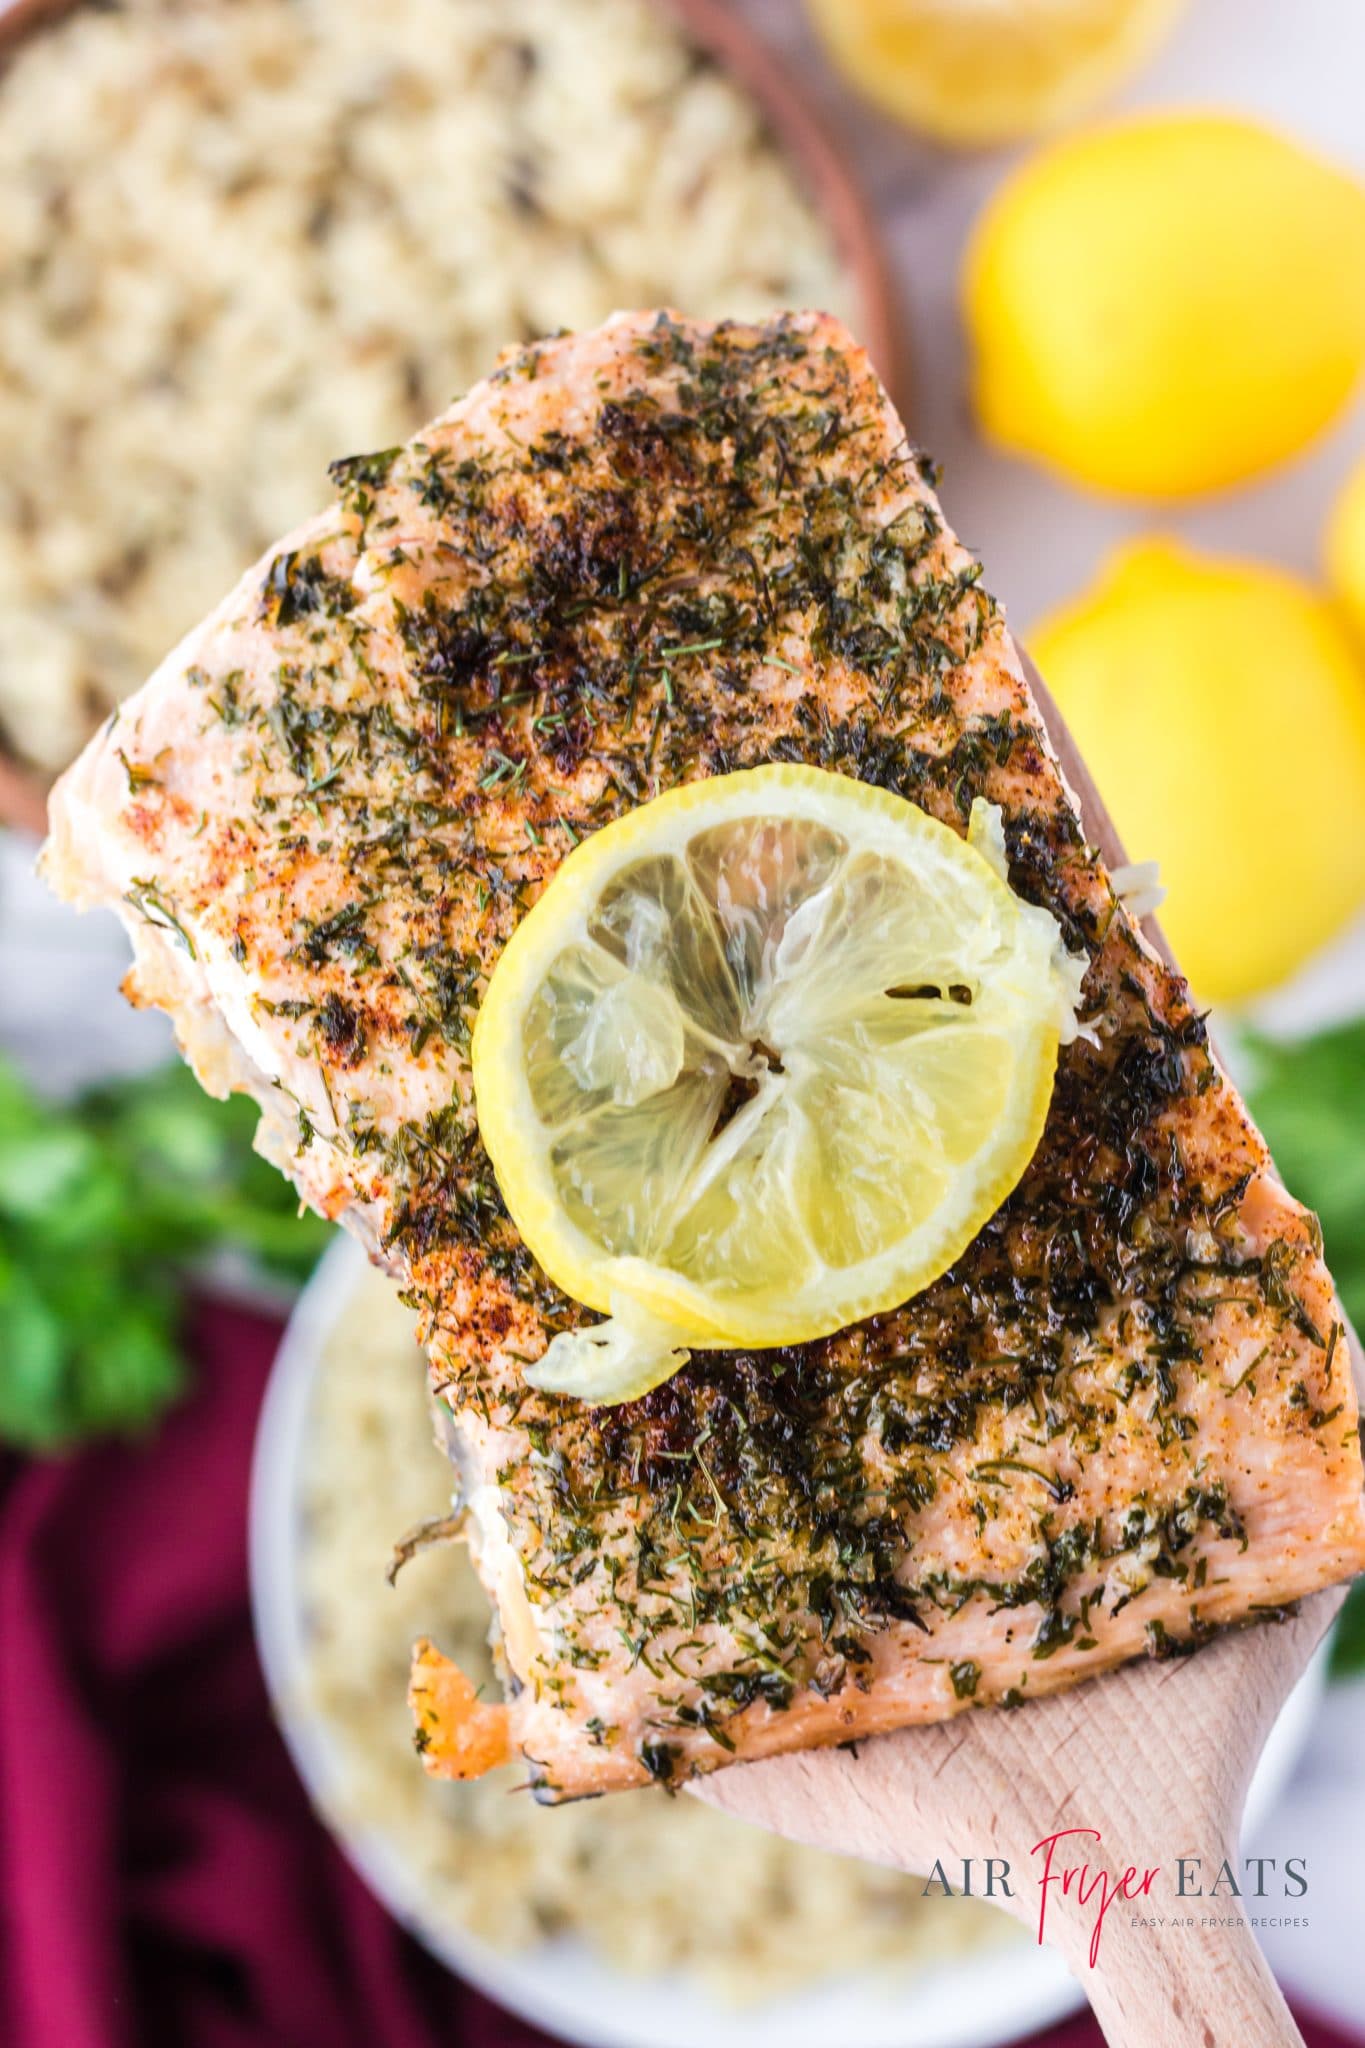
Ninja Foodi Salmon Air Fryer Eats
Step 2. Marinade the salmon in the mixture for 1 hour. Step 3. Pre heat the Ninja Foodi Health Grill & Air Fryer. Step 4. Place the salmon fillets on the grill plate, set to high and close the lid. Step 5. Cook for 10 - 12 minutes. Check midway and if it is grilling too fast, adjust temperature and time.
How To Cook Frozen Salmon In The Ninja Foodi
Instructions. Pat the salmon filets dry. In a small bowl, stir the lemon pepper, garlic powder, and salt together. Brush the salmon with the butter, and sprinkle with the seasoning mixture. Preheat your Ninja Foodi to 390° F on the air crisp mode. Arrange the salmon filets skin side down. Cook for 8 minutes.
Easy Ninja Foodi Grill Salmon Recipe Meatloaf and Melodrama
STEP FOUR: Sprinkle the salmon rub evenly on both sides and let the rub absorb into the fish while you preheat your grill. STEP FIVE: Set the Ninja Grill to the grill setting. Set the temperature to high and the time to 20 minutes. STEP SIX: Place the filets on the Ninja Grill skin side up and cook for 5-6 minutes. Flip.
Easy Ninja Foodi Grill Salmon Recipe Meatloaf and Melodrama
Place fish fillets and teriyaki sauce in a large resealable plastic bag or container. Move fillets around to coat evenly with sauce. Refrigerate for at least 1 hour and up to 12 hours. Step 2. Insert grill grate in unit and close hood. Select GRILL, set temperature to MAX, and set time to 8 minutes. Select START/STOP to begin preheating. Step 3.
